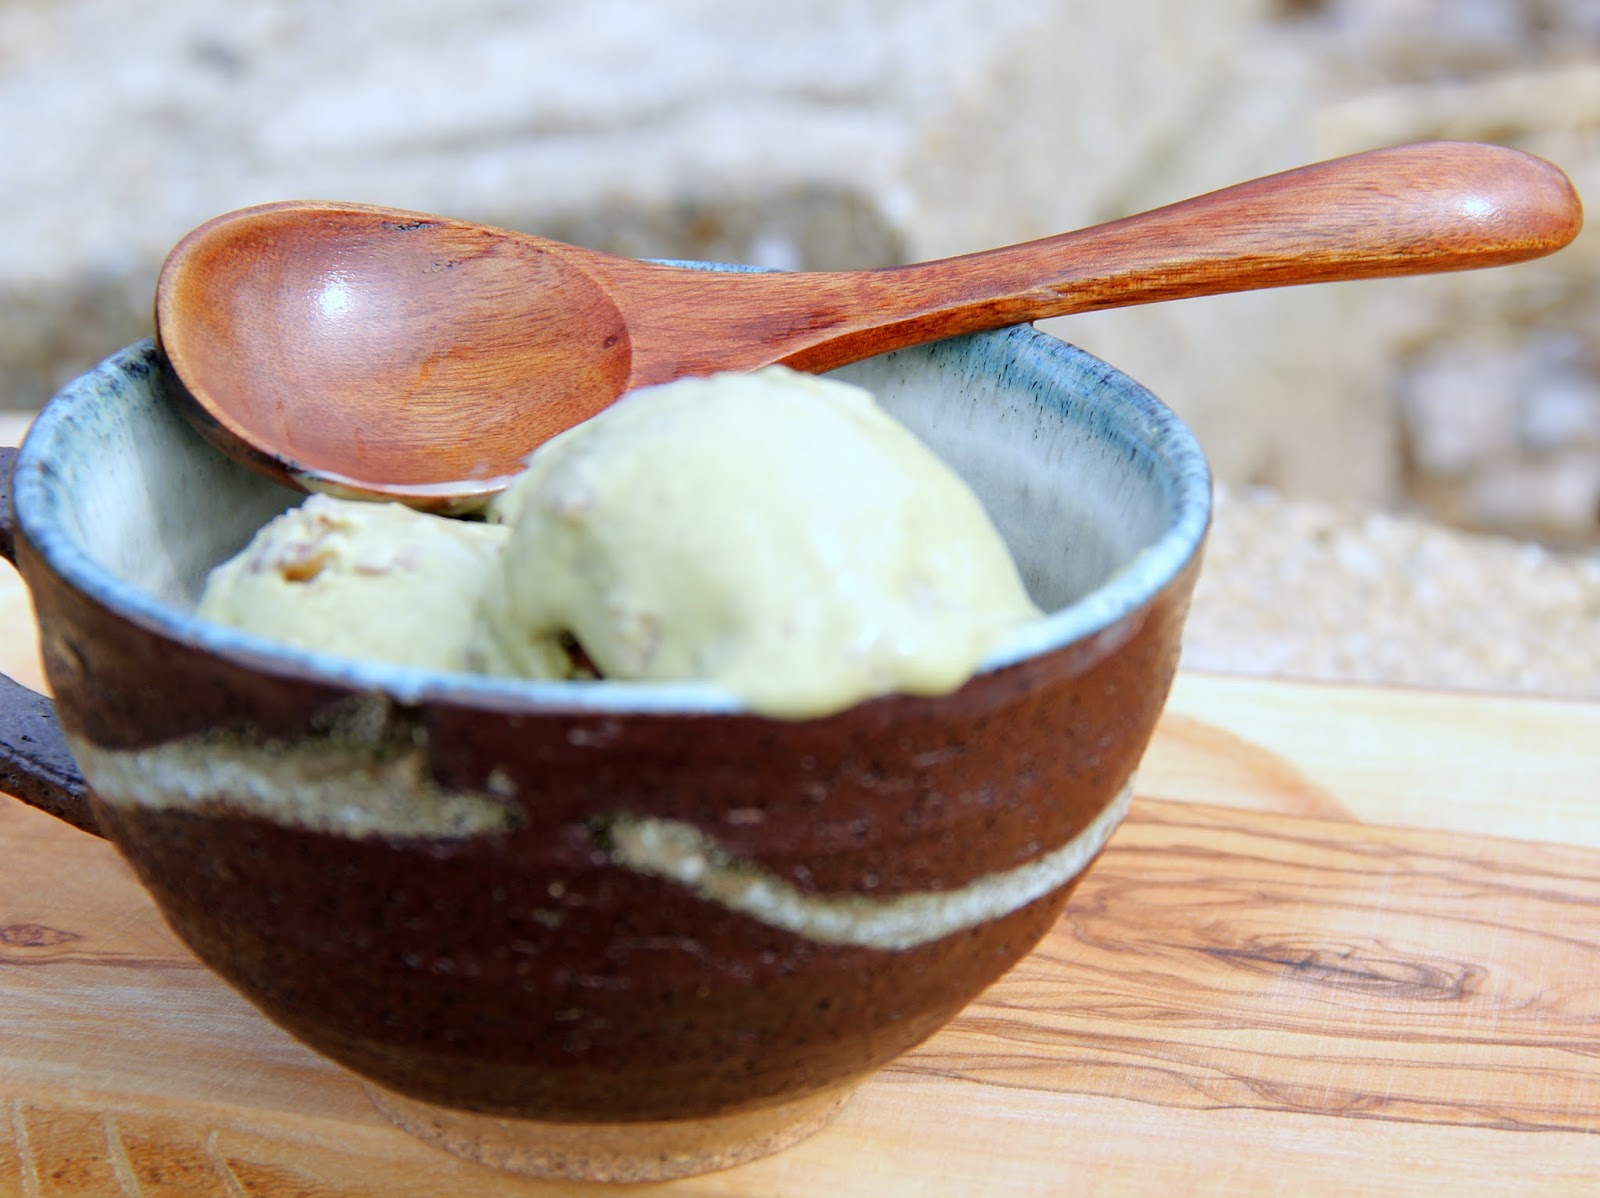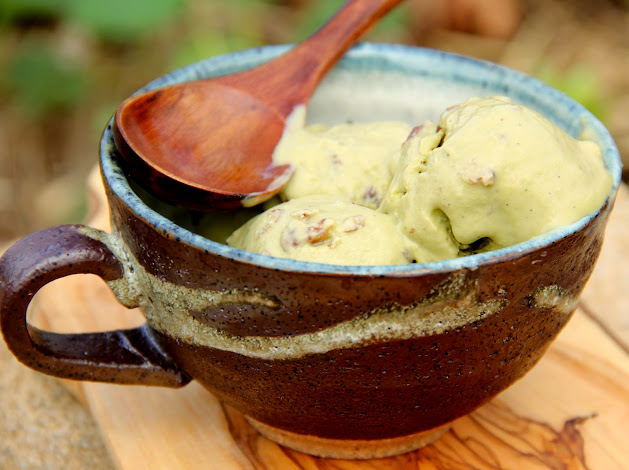
Showing posts with label Dessert. Show all posts
Faloodeh Cocktail

Today's post will be short and sweet. I have been getting a lot of use out of my ice cream maker this summer, and the results have been great. Check out these Matcha Pecan and Chocolate Shiso ice creams for pictures and recipes. I wanted to demonstrate that there were even more fun uses for your home ice cream maker. Ice cream makers can be used to make slushies for the family, or adult frozen beverages.

Americans love frozen Margaritas and frozen Pina Coladas. These sugary slushie cocktails are served in Mexican restaurants, hotel pools, and really anywhere that depends on 'spring break' to fuel its economy. I actually do enjoy all of these things, but a giant fishbowl filled with an alcoholic slushie is too sugary for my personal taste. That is why I would suggest making a frozen Margarita, Pina Colada, or Faloodeh cocktail at home. Homemade beverages allow for monitoring the quality and quantity of sugar and alcohol consumed, your body will thank you the next morning.

For the unacquainted, Faloodeh is a Persian frozen dessert, flavored with rose water and mixed with rice vermicelli noodles. The combination sounds somewhat odd, but the texture is addictive and the frozen rose water is unbelievably refreshing. Faloodeh is considered by many to be one of several proto-iced dessert's which eventually led to the creation of ice cream and sorbets. Faloodeh has been documented as early as 400 B.C.E. (Iran Gazette).

*If you wish to make a non-alcoholic version, simply omit the alcohol and add cooked then cooled rice vermicelli noodles, or omit the noodles as well and enjoy as a rose water sorbet. 


Faloodeh Cocktail


Faloodeh Cocktail


Ingredients
  • 1 T Rose water
  • 2 c Water
  • 1/2 c Sugar
  • 1/2 Lime, squeezed
  • 1/2 Lemon, squeezed & zested
  • 1/2 c Premium vodka
Cooking Directions
  1. Create simple syrup by combining water and sugar, bring to a boil in a heavy bottomed pan until the sugar dissolves. (I made a 4:1 water to sugar ratio for health reasons, it is more than adequate, but feel free to adjust to 2:1 or 1:1)
  2. Let thoroughly cool.
  3. Combine the rose water, simple syrup, citrus juice, zest, and vodka into a bowl.
  4. Mix in an ice cream maker until slushie consistency.
  5. Additional tip: To keep the slushie consistency longer chill your serving glass in the freezer for 30 minutes prior to serving.
Total Time: 30 min
Citations and Further Readings:
  • Han, Emily. " Recipe: Faloodeh (Persian Rose Water Ice)." The Kitchn. N.p., 28 Aug. 2009. Web.
  • Nate, Barksdale. "Snow in Summer: A Global History of Frozen Treats." Hungry History. History, 20 June 2014. Web.
  • "Shiraz Shirazi Faloodeh." Iran Gazette. N.p., n.d. Web.
Chocolate Shiso Ice Cream

I have been interested in Japanese cuisine for a very long time. I find the exotic ingredients and techniques fascinating. I try to incorporate Japanese ingredients into my cooking at every opportunity. This eagerness to experiment with Japanese ingredients led me to discover how chocolate and shiso pair as a brilliant flavor combination.

Shiso also known as red perilla is actually a herb native to China. This member of the mint family was brought over to Japan around 700 or 800 AD, where it then acquired its Japanese name "shiso". (McGee 404-405) Shiso is used with sushi, sashimi, grilled meats and fish, and as garnish in Japan. In Korean cuisine green perilla is often used as a lettuce wrap. In China shiso is used as a medicinal ingredient to cure a slew of health issues. So perilla is popular in Asia, but why is it so common in North America?

Despite shiso being more prevalent in Asian cuisine, shiso can be found all over the United States. In fact earlier this year I spotted shiso growing in a public park in Louisville, Kentucky among other local plants and weeds. If you are having trouble finding shiso, check out your local Asian market, they are usually sold in the fresh produce section.


Chocolate Shiso Ice Cream


Chocolate Shiso Ice Cream

Ingredients


  • 1 & 1/2 c Whole milk
  • 1 & 1/2 c Heavy cream
  • 6 Large egg yolks
  • 1/3 c Unsweetened cocoa powder
  • 1 c Sugar
  • 1/4 c Corn syrup
  • 2 c Shiso, packed and processed
Cooking Directions

  1. Combine milk, cream, 3/4 c sugar, chopped shiso, and cocoa powder in a heavy bottom sauce pan.
  2. Bring to a simmer and let the sugar dissolve then turn off the heat.
  3. Let rest for 30 minutes.
  4. Combine 1/4 c sugar, corn syrup, and egg yolks in a bowl and mix thoroughly.
  5. Temper the eggs with milk mixture.
  6. Transfer the eggs back into the pan and heat up until an instant read themometer reads 180F. Turn off the heat immediately, pour through a fine strain into a new metal container and transfer to an ice bath.
  7. Let the ice cream base sit in the refrigerator over night.
  8. Follow your ice cream maker's directions and spin the base until thick. Freeze and then serve as desired.
Total Time: 1 hour + Rest Overnight
Citations and Further Readings:
  • Behr, Edward. " Labiatae: Herbs of the Mint Family." The Art of Eating. The Art of Eating, 12 May 2015. Web.
  • Kawasaki, MIki. "Do You Know Your Tsukemono? A Guide to Japanese Pickles." Serious Eats. Serious Eats, 6 June 2014. Web.
  • McGee, Harold. On food and cooking: the science and lore of the kitchen. Simon and Schuster, 2007.
  • Mouritsen, Ole G. "Preparation of Sushi." SUSHI Food for the eye, the body & the soul. Springer US, 2009. 152-189.
Pancake Bread Pudding

Unsustainable practices found in large scale food production, distribution, and commercialization are not primarily focused on nutrition, profit margins dictate our large scale food production and agriculture practices. There are many issues that I hope to address in future posts, but today I wanted to focus on food waste. Food waste is both a humanitarian and ecological issue, which neither mainstream journalism or politics has adequately addressed, yet almost every one of us is guilty of wasting food to varying scales. In fact, the USDA states that in 2010, 30-40% of the US food supply (about 133 billion pounds of food) were thrown out and never consumed. These numbers included retail food suppliers, restaurants, and home kitchens.

133 billion pounds of food per year is an incredible amount of food to sit in a landfill for the rest of eternity, considering that a large portion of it could go to feeding hungry people or be used in agriculture to feed animals or compost. I do not have a cure-all solution for our food waste problem, but I do think that through better management, storage methods, and creativity our nation can reduce food waste especially in the home sector. That is why I want you to take a moment and think about what food you have thrown out in the past week. What steps could you have taken to preserve and utilize that food?

This recipe came about after a Sunday pancake breakfast where I was faced with a wasteful dilemma of my own. There were plenty of leftover pancakes and despite a desire to trash the leftovers and be done with it, I started to brainstorm ways to re-purpose, and the result was a winning dessert. Bread pudding is a perfect way to save and re-purpose bread, or other dough/batter products, and it generally only requires staple pantry and refrigerator items.

Pancake Bread Pudding


Pancake and Blackberry Bread Pudding


Ingredients
  • 1 & 1/2 c Whole milk
  • 3 c Pancake scraps, torn
  • 2 Large eggs
  • 1 c Sugar
  • 1 T Vanilla extract
  • 2 Blackberries per pudding
  • 1/2 t Cinnamon
  • 1/4 t Ground sage
  • Butter to coat tin
Cooking Directions
  1. Coat cupcake tin with butter and preheat oven to 350 .
  2. Add milk and pancake scraps into a bowl and combine with hands.
  3. Mix eggs, sugar, vanilla extract, and spices in a separate bowl.
  4. Combine both bowl's contents and mix.
  5. Pour batter into cupcake tin.
  6. Stick 2 blackberries in each cupcake.
  7. Bake for 40 minutes or until set.
  8. Let sit for 10 minutes then remove and transfer to a wire rack.
Total Time: 1 hour
Citations and Further Readings:
  • "USDA and EPA Launch U.S. Food Waste Challenge Calls on both Public Sector and Private Industry to reduce food waste." www.USDA.gov. USDA, 4 June 2013. Web.
Matcha Green Tea Ice Cream with PecansWhether spring, summer, or early autumn, the warmer seasons would not be as memorable if they did not include the occasional ice cream cone or sundae. While my lactose intolerant friends might strongly disagree, I believe that ice cream is a fundamental bonding tradition. By the way lactose intolerance does not exclude anyone from warm weather bonding over frozen treats, there is a world of beautiful dairy-free sorbets and other frozen treats such as My Award Winning Roasted Garlic Sorbet or a Faloodeh Cocktail.

Our story today begins with me acquiring a used ice cream maker off of the local classifieds for a ridiculously good price. Sorbet, gelato, ice cream, and frozen yogurt all require an ice cream maker for a proper texture, so getting your hands on one is the first step to unlocking personal frozen dessert freedom. Investing in an ice cream maker may seem like a large obstacle at first, but once you start making ice cream at home, the quality of ice cream made surpasses almost anything you can buy in the supermarket and even most ice cream stands.

While homemade ice cream may be a new concept, Ice cream and sorbets are hardly a new innovation. In the 13th century Arabs discovered that by adding salt to flavored waters and sugared creams and then freezing, slushes would be created instead of becoming frozen blocks of ice or cream. (McGee, 39). Even before the modern origins of ice cream, frozen desserts such as Faloodeh, iced vermicelli noodles flavored with rose water, honey, saffron, ect existed in the Persian empire dating back some 2,500 years(Marks).

The ice cream in today's recipe is based on a custard due to the percentage of egg yolk and the fat content of the cream. Ice cream can be made with less egg yolk, or even by omitting the yolks all together, however I would not recommend omitting the yolks. The egg yolks provide stability, a longer shelf-life, smoother texture(Falkowitz), and a richer mouth feel, which are all qualities that I believe make a great ice cream.

In addition to the egg yolks in this recipe the addition of honey serves a very interesting function. Honey is known as an invert sugar, this is a sugar composed of fructose and glucose with a viscous texture. Such invert sugars include honey, maple syrup, and corn syrup to name a few. Invert sugars have a lower freezing point and help with reducing ice crystals that may otherwise form in homemade ice cream. The result is a creamy smooth texture with a hint of honey, which of course is wonderful with green tea.

The green tea used in this ice cream recipe is a very special powdered green tea known as matcha. Matcha is a pulverized green tea from Japan, highly regarded for its use in the Japanese tea ceremonies. (Tsuji, 334) Matcha's intense flavor and powdered texture also makes it ideal for cooking applications including ice cream bases. Matcha may be somewhat difficult to find at the average super market, but Japanese supermarkets, specialty tea stores, and of course the internet should provide reasonable options.
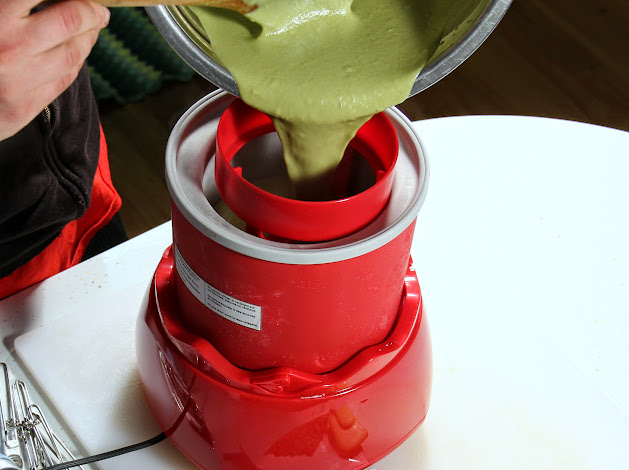
Matcha Pecan

Matcha Green Tea Pecan Ice Cream


Ingredients
  • 2 c Heavy cream
  • 1 c Whole milk
  • 1/2 c Cultured buttermilk
  • 8 Egg yolks
  • 3/4 c Sugar
  • 1/4 c Honey
  • 2 T Matcha (powdered green tea, no substitutes will work)
  • 1/8 t Kosher salt
  • 1/2 c Crushed pecans
  • 1 Vanilla bean, scraped
Cooking Directions
  1. Separate 8 egg yolks from egg whites. Reserve the egg whites for another use.
  2. Scrape all the innards of the vanilla bean and set aside.
  3. Add about 1/4 c of sugar to the egg yolks and whisk until combined.
  4. Combine cream, whole milk, buttermilk, the remaining 1/2 c of sugar, honey, matcha, vanilla bean scrapings, and salt into a sauce pan.
  5. Bring the liquid mixture up to a simmer and shut off the heat. Whisk thoroughly with a clean whisk while the liquid is heating up.
  6. Temper the egg yolks with the warm liquid. This technique is done by slowly introducing hot liquid to egg yolks and quickly whisking. If the egg yolk is introduced too quickly the egg yolks will solidify and not incorporate. For more information Watch this Tempering Video.
  7. Once tempered, add the egg mixture back to the remaining liquid and turn the heat on medium high. The goal is to thicken up the mixture so that it coats the back of a spoon, cook it to far and it will curdle.
  8. Quickly transfer to the ice bath you previously set up, stir to cool down if necessary.
  9. Once completely cool add to your ice cream maker, follow the ice cream machines instructions.
  10. After pouring the liquid mixture add the pecans and let the ice cream maker work it's magic.
  11. Once solidified transfer to a container and store in the freezer over night, the next day this beautiful ice cream will be set and ready to enjoy.
Total Time: 1 Hour + Rest overnight
Citations and Further Readings:
  • Falkowitz, Max. "Do I Need to Use Eggs in Ice Cream (and How Many?)." Serious Eats. N.p., 2 Aug. 2013. Web. Path: http://sweets.seriouseats.com/2013/08/how-many-eggs-should-i-use-to-make-ice-cream.html.
  • Marks, Gil. Encyclopedia of Jewish food. Houghton Mifflin Harcourt, 2010.
  • McGee, Harold. On food and cooking: the science and lore of the kitchen. Simon and Schuster, 2007.
  • Tsuji, Shizuo. Japanese cooking: a simple art. Kodansha International, 2006.

Butternut Squash Honey Pie American as apple pie is a phrase we have all heard at one point or another. Why is that? American's do consume their fair share of pie, but it is hardly an American invention. Pie is a cooking tradition that dates back to medieval Europe. During this time pie was considered to be pretty much anything that was baked in an oven and was not bread. Medieval cooks would often use leaves or clay to form a "pie crust" around a piece of meat. The original pie shells were several inches thick and not meant to be eaten, they simply served as a food preservation vehicle to protect perishable foods from air. (Clarkson)

This medieval tradition of clay pie crusts did not persist, rather it evolved with the invention of the pastry shell. A delicious edible vehicle for savory and sweet fillings. The two modern pie crusts used today are the pie pastry crust that consists of flour, water, and a fat. This crust is used for both sweet and savory pies. The other crust is a crumb crust, generally reserved for sweet desserts. A crumb shell is simply a crumbled cookie or similar baked good, which is mixed with butter then patted firmly into a pie pan. (Haedrich)

Pumpkin pie is common in the autumn, this is well deserved. However, there are over 10 types of common winter squash, and every variety can be roasted and pureed to form a unique and delicious pie filling. After picking up a gorgeous butternut squash from Bloomington's Farmers Market I knew it was destined to become part of a pie. In addition to adding unique flavors to an autumn pie, winter squashes are significantly hardier than their summer kin and can last for months at room temperature.  Buy when you see a good looking squash and don't worry too much about spoilage.

The condensed milk in my recipe is an excellent source of body and sweetness, I wanted just a little more sugar. To sweeten the filling I used honey, this decision was influenced by the nature of the squashes life. Squash plants require either North American native squash bees or old world honey bees to pollinate squash plants. (Cane) Simply put no bees means no butternut squash, no pumpkin, no zucchini, ect... So the inclusion of honey ties into the squashes life cycle.
 

I have a romantic ideal of the perfect a rustic pie. By that I mean something that looks simple and hand-fashioned, and full of soul. You can use a pre-made pie dough for this recipe, but it is so easy to make a fresh pastry shell, and it's visually way more appealing. An influential author of mine came up with the perfect ratio for a pie dough. A ratio of 3 parts flour 2 parts fat and 1 part water, all by weight.(Ruhlman) This ratio will come in handy every time. Chef John of Foodwishes.com also released a great video blog entry about food processor pie dough. Check the video out here

Before Oven


Butternut Squash Honey Pie

Ingredients
  • 2 c Butternut squash puree, roasted
  • 1 (14oz) Can of condensed milk
  • 2 Large eggs
  • 1 T Honey
  • 1 t Ground cinnamon
  • 1/2 t Ground ginger
  • 1/2 t Ground nutmeg
  • 1/2 t Kosher salt
  • 1 9" Pie shell (fresh or pre-made)
Cooking Directions
  1. Preheat oven to 350F
  2. Slice butternut squash in half, remove the seeds and reserve for a different use. Coat the squash with regular olive oil and roast in the pre-heated oven for 40-50 minutes.
  3. Puree squash meat, and let come to room temperature.
  4. Raise the temperature of the oven to 425F
  5. Combine all ingredients except for the pie shell in a bowl and whisk until custard consistency.
  6. Pour custard into pie shell.
  7. Cook the pie uncovered for roughly 15 minutes at 425F then change the oven temperature to 350F. The pie will take another 30-45 minutes until the custard has set. This can be tested by sticking a knife in the center of the pie, and if the knife comes out clean the custard has set.
Total Time: 2 hours

Citations and Further Readings:
  • Clarkson, Janet. Pie: A Global History. London: Reaktion Books Ltd, 2009. 18-20. Print.
  • Cane, Jim. "Squash Pollinators of the Americas Survey (SPAS)." United States Department of Agriculture Agricultural Research Service. USDA, 4 Aug. 2009. Web. 3 Dec. 2014. <http://www.ars.usda.gov/Research/docs.htm?docid=16595>.
  • Haedrich, Ken. Pie: 300 Tried-and-True Recipes for Delicious Homemade Pie. Boston: The Harvard Common Press, 2004. 26. Print.
  •  Ruhlman, Michael. Ratio. New York: Scribner, 2009. Print.
Photos by Jordan Henline
Duck Fat Cherry Vanilla Creme Brulee

To a normal human being, dessert is not usually the first thing that comes to mind when one says 'duck fat'. But why not? It is rich and savory, substituting duck fat for butter or cream just makes sense. Granted I would put duck fat in everything if I had an endless supply!

Crème brûlée may seem like a dessert only available in the fanciest of restaurants, but it's actually a pretty simple dessert. Crème brûlée is one of several variations of crème anglaise, which is an indispensable pastry custard known as simple vanilla sauce. Crème anglaise is milk, cream or a combination which is sweetened with sugar, flavored with vanilla, and thickened by egg yolk (Ruhlman 211). Crème brûlée can be made with almost all common pantry ingredients, and it has been for centuries.

The first recipe for crème brûlée appeared in a cookbook by François Massialot called Le Cuisinier Royal et Bourgeois in 1691 C.E. (Muusers). Massialot produced a similar product to a modern crème brûlée but without the modern equipment available to the everyday cook. Massialot used a red hot shovel as a salamander, fresh out of a fire to caramelize the sugar on top of his crème brûlée. We are lucky enough to be well equipped with ovens, broilers, and over 300 years of human trial and error. That means there is no excuse not to create delicious crème brûlée in our homes whenever we please.

My version of crème brûlée contains a personally important triad of flavors. To me duck fat, dark cherry, and vanilla bean represent the feeling of warmth during the winter months. In fact, vanilla in particular has a strong psychological effect with regards to both flavor in scent. Vanilla's scent has been proven to reduce stress and anxiety in humans, "Cancer patients undergoing Magnetic Resonance Imaging - a diagnostic procedure known to be stressful - reported a massive 63% less anxiety when heliotropin (a vanilla fragrance) was administered during the procedure" (Fox 9).

I am uncertain if the pairing of cherry and vanilla is inherently coveted by humans or youthful nostalgia makes it so enticing. Bright red cherries stacked on top of scoops of vanilla ice cream bring back simple yet happy memories for many adults. Cherry and vanilla can be so much more though! The cherry balances out the duck fat and vanilla in this dessert to create a sense of harmony. I find it this convection contradictory, both experimental yet traditional. However, I'd take a contradictory yet delicious dessert over a consonant and dull last course any day.

Caramelize the Crust


Duck Fat Cherry Crème Brûlée

Ingredients
  • 1 & 3/4 c 2% milk
  • 1/2 c Liquid duck fat
  • 1/2 c Frozen sweet cherries (preferably pitted)
  • 1/2 c Sugar
  • 1/2 c Egg yolks (6-7 yolks)
  • 1 Vanilla bean
  • 1 lime
  • pinch of salt
Cooking Directions
  1. Preheat oven to 325 F.
  2. Blend ½ C of pitted cherries in a food processor.
  3. Put the 1 & 3/4th C of 2% milk and pureed cherries in a small pot, set on medium heat. Scald the milk by heating until the mixture reaches 180 F. Once the milk reaches this point take off heat immediately, set aside covered for 15 minutes.
  4. Now pour ½ C of egg yolks, ½ C of sugar, the scraped insides of the vanilla pod, and a pinch of salt into a separate metal bowl. Place the leftover vanilla pod in the resting pot containing the milk. Whisk the egg/sugar mixture until thoroughly combined.
  5. After the milk mixture has sat for 15 minutes, slowly pour through a strainer into the egg yolks. The milk may still be warm, thus temper the egg mixture by pouring a little milk then whisking. Repeat this process several times before incorporating the milk mixture into the eggs.
  6. Take the room temperature ½ C of liquid duck fat and pour as slowly as possible into the egg/milk mixture. Try to keep the stream as thin as a pen head or smaller while pouring. Vigorously mix to incorporate the duck fat into the liquid.
  7. Set up a double boiler by bringing a pot of water to a boil that is small enough to place your metal bowl on top of. Let the Metal bowl sit for 3-5 minutes while slowly stirring. The mixture should thicken up enough to coat the back of a wooden spoon.
  8. Once the mixture achieves a thickened consistency carefully pour into 6 separate 4 ounce and oven safe ramekins.
  9. Carefully place ramekins into a deep hotel pan and make sure there is plenty of space between ramekins. If you don’t have a hotel pan any deep oven-safe dish is fine.
  10. Pour water into the hotel pan, thus the water comes about ½ - 2/3 of the way up the sides of the ramekins. Be careful not to submerge any of the custard in water.
  11. Slowly place the water bath into the preheated oven for roughly 40-45 minutes or until the custard is set. The custard is set when there is a slight jiggle in the center, but it is no longer liquid. The best way to get perfect set custard is to check at around 35 minutes and then check often afterwards.
  12. Carefully remove the crème brûlée from the oven, and then remove from the water bath. Transfer all ramekins to the refrigerator for 90 minutes.
  13. When ready to serve sprinkle enough brown sugar to lightly coat the top of the custard. For best results use a crème brûlée torch to caramelize the sugar until the heat forms a perfect shell. If that is not available place the ramekins under a high heated broiler and watch as the sugar caramelizes.
  14. To finish the dish lightly sprinkle lime zest over the top of the caramelized shell.
Total Time: 3 Hours

Citations and Further Readings:
  • Fox, Kate. "The Smell Report." Social Issues Research Center. SIRC, n.d. Web. 18 Nov. 2014.
  • Muusers, Christianne. "Crème Brûlée." Coquinaria. N.p., 20 Feb. 2005. Web. 18 Nov. 2014.
  • Ruhlman, Michael. Ratio. New York: Scribner, 2009. 211. Print.
Photos by Jordan Henline
Garlic Saffron Sorbet

At the end of August 2014, I participated in my first cooking competition. The contest was sponsored by the Bloomington Garlic Festival. The recipes only condition was it must contain 6 cloves of garlic. Simple enough, right? Challenge excepted! Believe it or not, I won first place that day.

Winning this contest was a thrilling feeling, almost addictive. Now that I know how fun and stimulating these recipe contests can be, I am motivated to compete and create in future contests.

I am eager to share what I have learned. In my winning recipe, roasted garlic serves as the focal point. By knowing that garlic actually has a somewhat high sugar content. About one fourth of a garlic’s chemistry is composed of ten kinds of natural sugars. These include fructose, glucose, inulin and arabinose (Fulder and Blackwood). Since roasting garlic helps caramelize these sugars, I decided to use roasted garlic in a sweet treat. While uncommon, it actually makes sense. A garlic dessert would be whacky enough to get the judges attention. Mixing roasted garlic, saffron, and pear juice I created an interesting sorbet with a peculiar sense of harmony.

This garlic sorbet is easy to replicate and does not require an ice cream maker, so try this recipe at home for a unique garlic experience.

Sorbet Before Freeze

Garlic Saffron Sorbet Note: The Garlic Saffron Sorbet is comprised of three main components. These components are Saffron Syrup, Pear Juice, and Roasted Garlic Cloves. The components should be prepared simultaneously. Once the individual components are completed, the Sorbet recipe is on the next page.


Roasted Garlic Cloves

Ingredients
  • 6 Garlic cloves
  • 1 & 1/2 T Canola oil
  • 2 Sheets of aluminum foil
Cooking Directions
  1. Preheat the oven to 400 F.
  2. Place 2 sheets of aluminum foil on top of each other, then fold into a pouch.
  3. Cut the tops off of all the garlic and place into foil pouch.
  4. Pour canola oil over top the garlic. Fold over the pouch so that it seals.
  5. Place garlic packet in oven for 40-60 minutes. After 40 minutes check garlic frequently. The garlic should be tender to the poke of a fork.

Pear Juice

Ingredients
  • 2 Bartlett pears
  • 3 c Water
Cooking Directions
  1. Cut pears into quarters and place in water.
  2. Bring water up to a gentle simmer and let pears infuse with water. Feel free to smash pears with a spoon or whisk.
  3. After 45 minutes of simmering, strain the water mixture into a measuring cup and reserve 1 cup of pear juice.

Saffron Syrup

Ingredients
  • 1/2 c Cane sugar
  • 2 c Water
  • 1/8 t Saffron threads
Cooking Directions
  1. Combine cane sugar and water in a heavy bottom, medium-sized pot.
  2. Bring the mixture to a simmer and whisk until sugar dissolves into the water, then remove the pot from the heat.
  3. Wait until water stops bubbling, then add the saffron. Place a lid on top of pot, reserve until the other components are finished.
Garlic Saffron Sorbet

Ingredients
  • 2 c Saffron syrup
  • 1 c Bartlett pear juice
  • 1 T Lemon juice
  • 6 Roasted garlic cloves
  • pinch of salt
Cooking Directions
  1. Combine saffron syrup, pear juice, lemon juice, garlic cloves and salt into a food processor or blender.
  2. Process until thoroughly blended.
  3. Pour mixture into ice cub trays and let freeze over several hours or overnight.
  4. Put ice cubes back into a clean food processor and blend until sorbet consistency.
  5. Either serve immediately or freeze until desired texture.
Additional Equipment:
Ice Cube Trays
Fine Strainer
Food Processor or Blender
Aluminum Foil

Total Time: 12 hours

Citations and Further Readings:

  • Fulder, Stephen, and John Blackwood. Garlic: Nature's Original Remedy. N.p.: Healing Arts Press, 2000. Print.
White Chocolate Pistachio Butter Espresso Savoury Bite

There are few food establishments that I find more romantic than cafe's. At the heart of any cafe is strong coffee and great conversation. Although, interesting conversation shared over a warm beverage may have become rarer over the past few decades. That does not mean we should not still try to make room for one of the great simple pleasures in life. Catching up with old friends, sharing ideas with colleagues, or learning about a new topic from a well-traveled stranger.

The comfort of lively conversation around a cup of coffee or carefully crafted espresso has been a part of Western popular culture for centuries. In fact, espresso's popularity in Europe and the development of the café can roughly date back Around 1668 the Turkish ambassador in Paris had coffee parties. And within 10 years the institution of the café became "the resort of the most renowned wits, artists, and philosophers of the French metropolis - Rousseau, Voltaire, Piron, with Marmontel and many others." (Hewitt Jr. 18) Now this is not to say coffee was not popular in other parts of the world before Parisians fell in love with the drink, though the first Parisian cafe's predate the signing of the declaration of independence by almost 100 years.

Espresso is a personal favorite caffeinated drink of mine. As Dan Nosowitz at Popular Science points out, Espresso is easier to define what it is not, than what it actually is, but I think he did a great job. "Espresso is a concentrated, often thick coffee beverage with a layer of dense foam whose ingredients are exclusively coffee and water, created with a machine that forces hot water through a basket of tightly packed, finely-ground coffee for a limited amount of time at very high pressure."

Espresso has a very bold flavor, I wanted to develop something to eat along side my espresso that enhanced the flavor. Much like how the English eat biscuits or other savoury bites with their tea, I needed a morsel companion. The idea to pair a sweet with coffee is nothing new, but this recipe takes a new spin on a familiar concept. Nut butter and chocolate is an American favorite, and I found playing around with this idea birthed an irresistible companion for espresso.

White Chocolate Pistachio Butter Espresso Savoury Bite


White Chocolate Pistachio Butter Espresso Savoury Bite


Ingredients
  • 2 c White chocolate chips
  • 1 c Plain shelled pistachios
  • 1 T Honey
  • 1/4 t Kosher salt
  • 1/8 t Vanilla extract
  • 1/8 t Ground cardamom
Cooking Directions
  1. Preheat oven to 350 F.
  2. Roast pistachios for 6 minutes.
  3. Put in small food processor with honey, salt, vanilla, and cardamom (Put 1/4 t vegetable oil at a time if you need the butter to be more wet).
  4. Form small round disks on sheet pan with wax paper.
  5. Freeze pistachio butter in the freezer for 30 minutes.
  6. Start a double boiler and add white chocolate chips to the bowl.
  7. Spoon melted chocolate around the frozen pistachio butter chunks.
  8. Return the white chocolate pistachio butter bites to the freezer.
  9. Take the sheet pan out of the freezer and let the bites come to room temperature.
Total Time: 1 hour 30 min

Citations and Further Readings:
  • Afternoon tea recipes. BBC, n.d. Web. 3 Sept. 2014. <http://www.bbcgoodfood.com/recipes/collection/afternoon-tea>.
  • Hewitt Jr., Robert. Coffee: Its History, Cultivation, and Uses. New York: University of California Libraries, 1872. 17-18. Print.
  • Nosowitz, Dan. FYI: What Is Espresso?. Popular Science, 12 June 2012. Web. 3 Sept. 2014. <http://www.popsci.com/technology/article/2012-06/fyi-what-espresso>
Photos by Jordan Henline
Mulberry compote over vanilla ice cream. Served with fresh spearmint and frozen white mulberries.

If these articles and recipes inspire anything, I would hope it be a new found desire to learn about the world and food sources around us. When we respect and learn from our environment then higher quality food becomes a common byproduct. Sustainable living is so important, it pays respect to the world that fosters us, helps us save personal and social resources, and generally gives us tastier ingredients to use.

This is where the humble mulberry comes in. The mulberry tree is a deciduous tree found all over the world with a huge supply of sweet berries that are often overlooked in urban environments. It is even considered a weed tree in many parts of the world (California Rare Fruit Growers, INC). There are many types of mulberries including black, red and white, and currently there are an estimated 10 to 17 different species of trees classified as mulberry.

Every June the berries become ripe in my region, so I go around and pick berries straight off the trees. The tart berries are excellent in pies or fruit fillings, and the ripe berries are excellent just by themselves. I do highly suggest giving the berries several good washes though.

This compote is a simple dish using beautiful fruit collected on a short bike ride around town. The berries provide a sweet and rich flavor while the malic and citric acid of the lemon juice provides a mouth-watering tartness. This compote can be used any way you wish, I simply serve it warm over a scoop of Ice cream.

reserved mulberries and lemon zest


Mulberry Compote

Ingredients
  • 1 & 1/2 c Mulberries(stemming is optional)
  • 2 T Sugar
  • 2 T Lemon Juice
  • 1 T Lemon zest
  • 2 T Water
  • mint to taste
Cooking Directions
  1. Set aside 1/2 C of Mulberries and Lemon Zest
  2. Add the rest of the ingredients into a sauce pan.
  3. Cook over medium heat until liquid is released and berries become soft.
  4. Add the reserved Mulberries and Zest and cook for another 5 minutes over low heat.
  5. Serve immediately.
Total Time: 20 min

Citations and Further Readings:
  • "Mulberry." Mulberry. California Rare Fruit Growers, Inc, 1997. Web. 7 July 2014. <http://www.crfg.org/pubs/ff/mulberry.html>.
Photos by Jordan Henline