Showing posts with label Egg. Show all posts
Potato and Carrot Latke

The total freedom of experimentation while writing Joy and Feast articles is extremely gratifying. Sometimes my experiments come from what produce I can source fresh, other times I find inspiration from a myriad of books or articles that cross my table. Sometimes I am able to explore food which has a significant meaning to me. Latkes or potato pancakes are a food that I have been acquainted with my entire life, I have wanted to write an article about them since I began this blog.

Potato pancakes are consumed during the Jewish holiday of Hanukkah, this is actually a fairly recent tradition. Jews, particularly in Western Europe have been consuming fried cheese pancakes for Hanukkah since the late middle ages. It was not until the mid-1800's when a series of crop failures in Ukraine and Poland forced farmers to plant potatoes, a nightshade crop from the new world. Perhaps this abundance of potatoes influenced the adoption of potatoes in place of cheese pancakes during this period. Potato latkes have remained prominent ever since. (Avey) Fried potato pancakes span well beyond Jewish culture, potato pancakes are regularly enjoyed throughout Central and Eastern Europe, as well as in the Middle East.

Often "traditions" or in this case traditional foods are confined to a dogmatic perception of culture, when in reality culture is fluid. Culture reacts to influences both internally and externally. Modernity has allowed cooks access to more information, ingredients, and communication than at any other point in human history. Lines have always been blurred, and we will continue down this path. Therefore, I believe that looking at one cultures "traditional food" through the lens of another culture can inspire some pretty creative and delicious meals.

The lens that I envisioned today's recipe through took influence from India's great culinary tradition. Firstly, it is worth noting that the nation of 1.2 billion people (World Bank) has different cultural and food traditions depending on region within the country. India has influenced and been influenced by far flung cultures and empires for millenniums. The silk road encouraged the trade of spices in which eastern and western cultures passed through India and left their mark. In addition, India contains tropical (wet and dry), sub-tropical, and mountain climates allowing for a diverse spectrum of agrarian potential.

What I love about Indian flavors is how the cuisine embraces pungency, spiciness, and boldness. A basic fresh apple puree, can become addictive with the right use of Indian spices. Garlic, ginger, and chili is a common trinity throughout tropical latitudes. Bold Indian flavors with Potato latkes make an unforgettable dish.
Potato and Carrot Latke
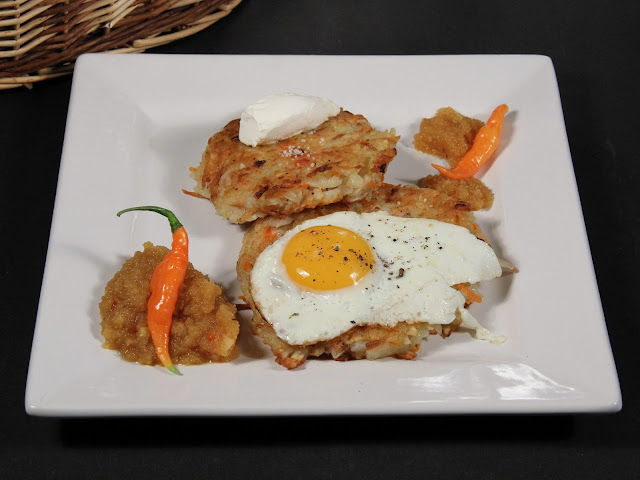
Potato and Carrot Latkes with Indian Spiced Apple Sauce


Potato and Carrot Latkes


Ingredients
  • 6 Russet potatoes, peeled
  • 2 Large carrots, peeled
  • 1 White medium onion, diced
  • 2 Large eggs
  • 1 c All-purpose flour
  • to taste salt & pepper
Cooking Directions
  1. Shred potatoes and carrots, I stored mine in acidulated water. That is water with about 1 t of lemon juice or vinegar. Omit this step if cooking latkes right away
  2. If stored in water make sure to thoroughly dry, extra moisture is bad for latkes
  3. Combine diced onion, shredded potatoes & carrots, eggs, and 1 c of flour into a mixing bowl. Season to taste.
  4. Heat up a pan over medium high heat with enough oil to cover the bottom.
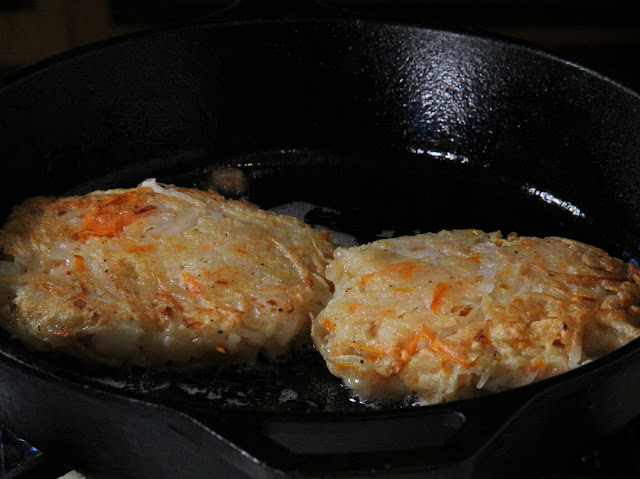
  5. Patty out latkes and add them to pan once the oil sizzles when droplets of water touch, or over 350F. The thinner the latke, the easier it will be to cook through the center. Take care not to crowd the pan.
  6. When the latke starts to brown around the side, flip and cook until browned on the other side.
  7. When finished quickly pat dry with a paper towel to absorb excess oil, then place into a pan with a rack in a low temp oven while the rest of the batches of latkes finish.

Indian Spiced Apple Sauce


Ingredients
  • 4 Medium sized sweet apples, peeled and cored
  • 2 t Ginger, minced
  • 1 t Garlic, minced
  • 1-3 Chilies, sliced
  • 1/2 Lemon, juiced & zested
  • 1 Star anise
  • 1 Green cardamom pod
  • 5-8 Peppercorns
  • 1/4 t Brown mustard seed
  • 1/8 t Cumin seed
  • salt to taste
Cooking Directions
  1. Start with 4 medium sized ripe and sweet apples. Peel, core, then puree and set aside.
  2. Toast star anise, cardamom pod, peppercorns, brown mustard seed, and cumin in a dry skillet over medium high heat, constantly toss. Once the mustard seeds start to pop take off heat.
  3. Make a sachet with the toasted spice mix.
  4. Add vegetable or coconut oil to a pan and brown ginger and garlic for about a minute over medium high heat. Add the chilies and cook for another minute, constantly tossing or stirring.
  5. Add the apple puree into the garlic, ginger, chili mixture, and add about 2 T of water. Reduce heat to medium low. Add satchet of spices and cook for roughly 15 minutes.
  6. If to much water evaporates add more until a proper consistency and the spices meld with the sauce.
  7. Zest lemon and squeeze juice directly into the mixture. Add salt to taste and let cool to room temperature. Toss sachet when finished.
Total Time: 1 hour
Citations and Further Readings:
  • Avey, Tori. "Discover the History of Latkes During Hanukkah." Food. PBS, 12 Dec. 2011. Web.
  • "The Commonly Used Indian Spices." eCurry. N.p., 24 Aug. 2008. Web. 24 Aug. 2015.
  • "Total Population (in number of people)." The World Bank. World Bank, n.d. Web.
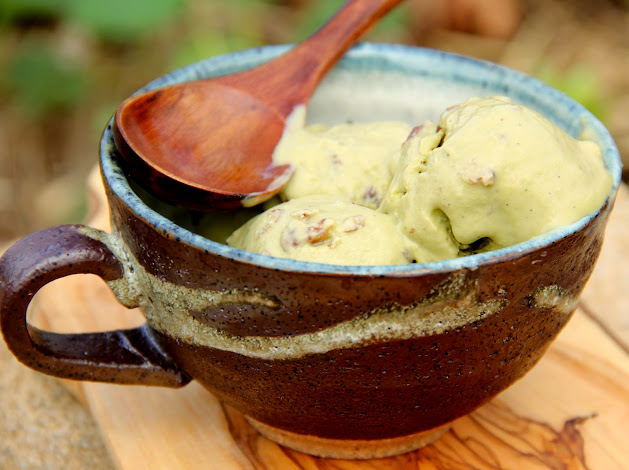
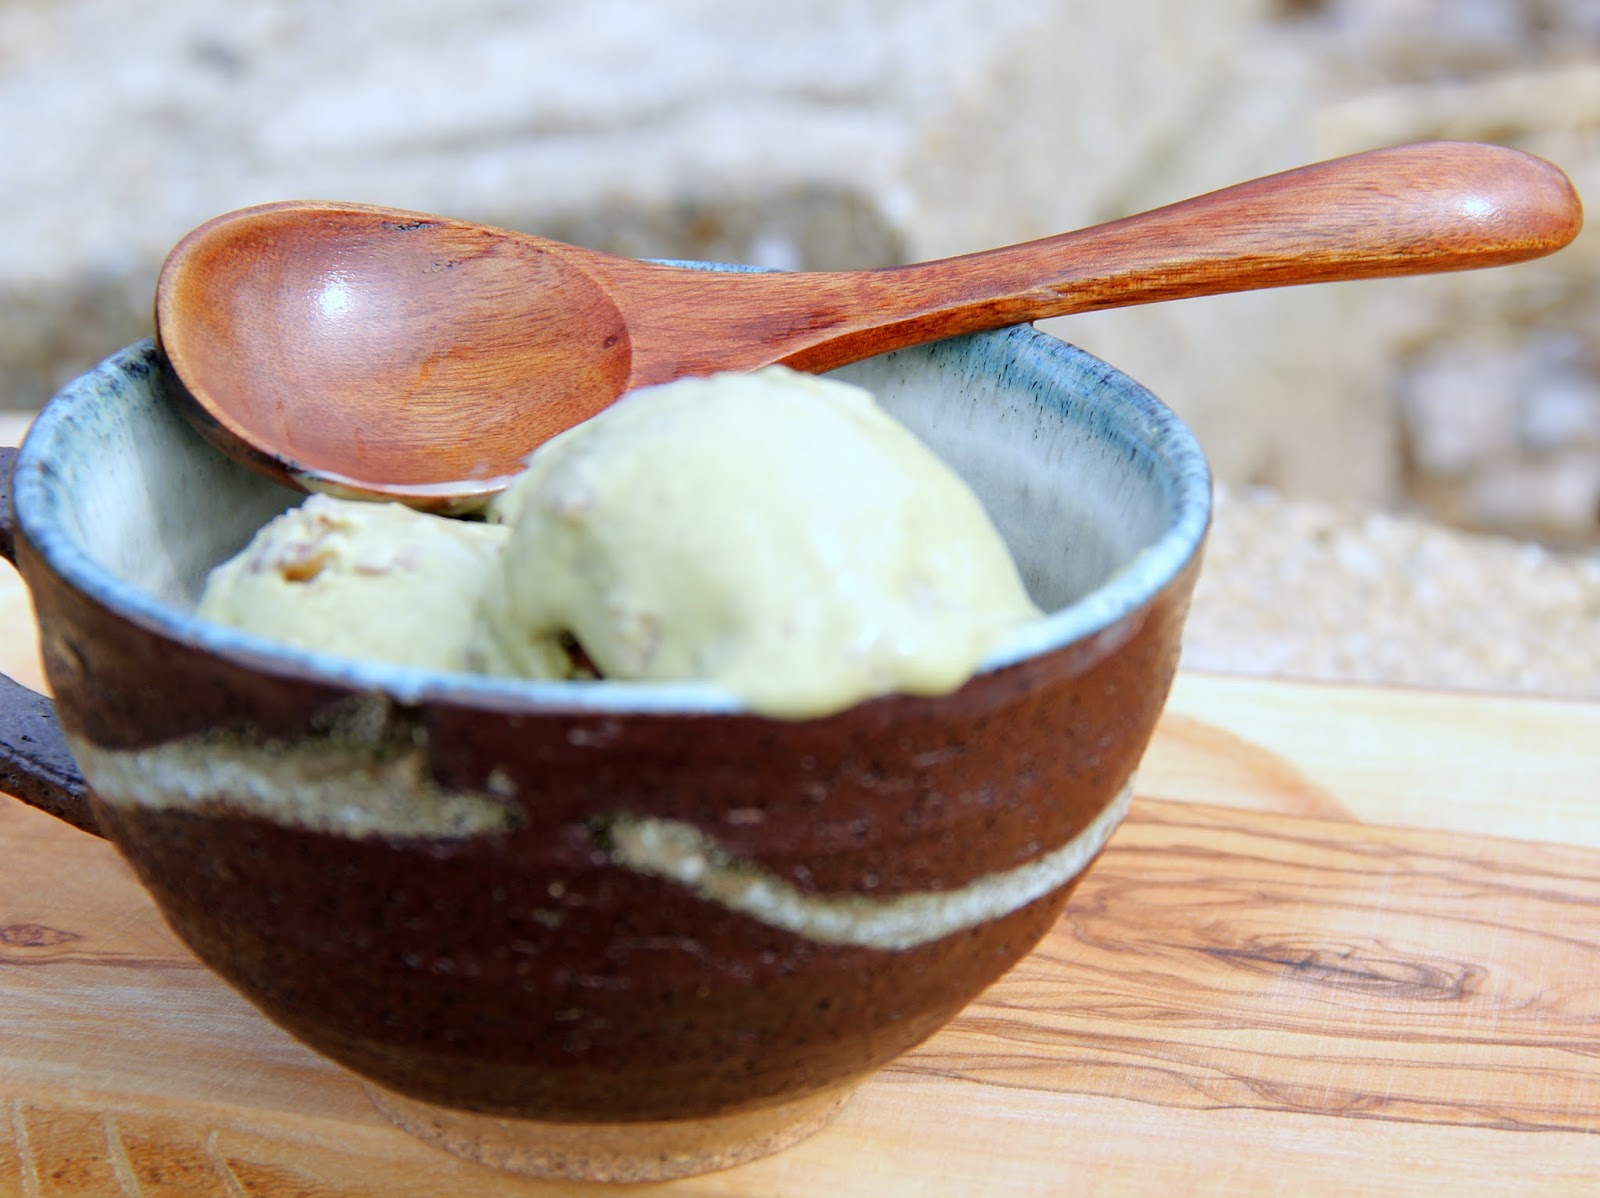
Matcha Green Tea Ice Cream with PecansWhether spring, summer, or early autumn, the warmer seasons would not be as memorable if they did not include the occasional ice cream cone or sundae. While my lactose intolerant friends might strongly disagree, I believe that ice cream is a fundamental bonding tradition. By the way lactose intolerance does not exclude anyone from warm weather bonding over frozen treats, there is a world of beautiful dairy-free sorbets and other frozen treats such as My Award Winning Roasted Garlic Sorbet or a Faloodeh Cocktail.
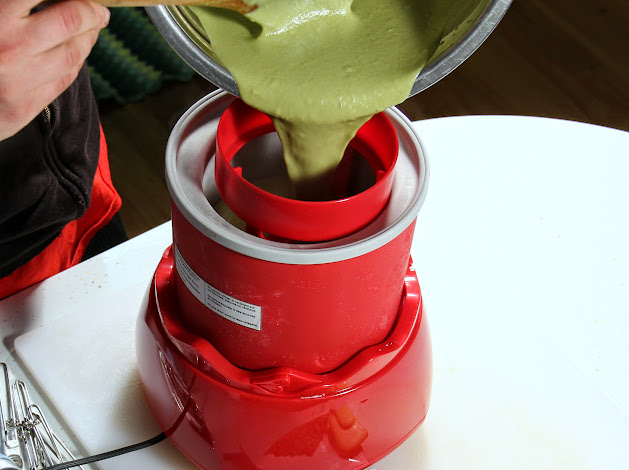
Our story today begins with me acquiring a used ice cream maker off of the local classifieds for a ridiculously good price. Sorbet, gelato, ice cream, and frozen yogurt all require an ice cream maker for a proper texture, so getting your hands on one is the first step to unlocking personal frozen dessert freedom. Investing in an ice cream maker may seem like a large obstacle at first, but once you start making ice cream at home, the quality of ice cream made surpasses almost anything you can buy in the supermarket and even most ice cream stands.

While homemade ice cream may be a new concept, Ice cream and sorbets are hardly a new innovation. In the 13th century Arabs discovered that by adding salt to flavored waters and sugared creams and then freezing, slushes would be created instead of becoming frozen blocks of ice or cream. (McGee, 39). Even before the modern origins of ice cream, frozen desserts such as Faloodeh, iced vermicelli noodles flavored with rose water, honey, saffron, ect existed in the Persian empire dating back some 2,500 years(Marks).

The ice cream in today's recipe is based on a custard due to the percentage of egg yolk and the fat content of the cream. Ice cream can be made with less egg yolk, or even by omitting the yolks all together, however I would not recommend omitting the yolks. The egg yolks provide stability, a longer shelf-life, smoother texture(Falkowitz), and a richer mouth feel, which are all qualities that I believe make a great ice cream.

In addition to the egg yolks in this recipe the addition of honey serves a very interesting function. Honey is known as an invert sugar, this is a sugar composed of fructose and glucose with a viscous texture. Such invert sugars include honey, maple syrup, and corn syrup to name a few. Invert sugars have a lower freezing point and help with reducing ice crystals that may otherwise form in homemade ice cream. The result is a creamy smooth texture with a hint of honey, which of course is wonderful with green tea.

The green tea used in this ice cream recipe is a very special powdered green tea known as matcha. Matcha is a pulverized green tea from Japan, highly regarded for its use in the Japanese tea ceremonies. (Tsuji, 334) Matcha's intense flavor and powdered texture also makes it ideal for cooking applications including ice cream bases. Matcha may be somewhat difficult to find at the average super market, but Japanese supermarkets, specialty tea stores, and of course the internet should provide reasonable options.

Matcha Pecan

Matcha Green Tea Pecan Ice Cream


Ingredients
  • 2 c Heavy cream
  • 1 c Whole milk
  • 1/2 c Cultured buttermilk
  • 8 Egg yolks
  • 3/4 c Sugar
  • 1/4 c Honey
  • 2 T Matcha (powdered green tea, no substitutes will work)
  • 1/8 t Kosher salt
  • 1/2 c Crushed pecans
  • 1 Vanilla bean, scraped
Cooking Directions
  1. Separate 8 egg yolks from egg whites. Reserve the egg whites for another use.
  2. Scrape all the innards of the vanilla bean and set aside.
  3. Add about 1/4 c of sugar to the egg yolks and whisk until combined.
  4. Combine cream, whole milk, buttermilk, the remaining 1/2 c of sugar, honey, matcha, vanilla bean scrapings, and salt into a sauce pan.
  5. Bring the liquid mixture up to a simmer and shut off the heat. Whisk thoroughly with a clean whisk while the liquid is heating up.
  6. Temper the egg yolks with the warm liquid. This technique is done by slowly introducing hot liquid to egg yolks and quickly whisking. If the egg yolk is introduced too quickly the egg yolks will solidify and not incorporate. For more information Watch this Tempering Video.
  7. Once tempered, add the egg mixture back to the remaining liquid and turn the heat on medium high. The goal is to thicken up the mixture so that it coats the back of a spoon, cook it to far and it will curdle.
  8. Quickly transfer to the ice bath you previously set up, stir to cool down if necessary.
  9. Once completely cool add to your ice cream maker, follow the ice cream machines instructions.
  10. After pouring the liquid mixture add the pecans and let the ice cream maker work it's magic.
  11. Once solidified transfer to a container and store in the freezer over night, the next day this beautiful ice cream will be set and ready to enjoy.
Total Time: 1 Hour + Rest overnight
Citations and Further Readings:
  • Falkowitz, Max. "Do I Need to Use Eggs in Ice Cream (and How Many?)." Serious Eats. N.p., 2 Aug. 2013. Web. Path: http://sweets.seriouseats.com/2013/08/how-many-eggs-should-i-use-to-make-ice-cream.html.
  • Marks, Gil. Encyclopedia of Jewish food. Houghton Mifflin Harcourt, 2010.
  • McGee, Harold. On food and cooking: the science and lore of the kitchen. Simon and Schuster, 2007.
  • Tsuji, Shizuo. Japanese cooking: a simple art. Kodansha International, 2006.
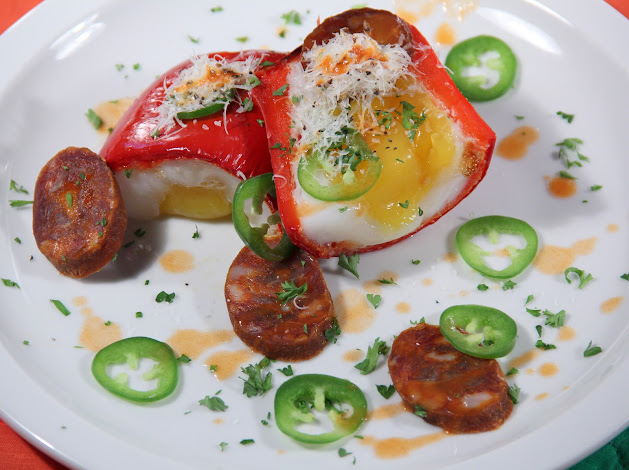
Baked Goose Egg and Red Pepper with Chorizo

This week's recipe was such a blast to develop and photograph. I was gifted three beautiful geese eggs from my friend. As a proponent of actual free range chicken eggs, these three geese eggs made the quality control cut. These geese have lived a happy life feeding on what nature provides, as well as produce scraps, a healthy diet generates richer and uniquely satisfying eggs. Eggs are marvels of nature, they are essentially maternal gifts of protection and nutrition to their offspring. Eggs provide birds, reptiles, amphibians, and fish with fats and proteins as well as other nutrients in order to develop into larger animals. With such a huge variety of eggs to take advantage of why do American's primarily only invest in chicken eggs, when there are delicious alternatives like geese eggs available? I believe that is a complex question with a variety of economic, agricultural, cultural, and environmental factors. However, if more Americans opened their minds to geese eggs as a food source, they would be in for a treat.

Geese, like chickens chickens will lay eggs regardless of fertilization. This means by not eating unfertilized geese eggs we are doing a disservice to ourselves, unfertilized geese eggs will eventually rot and completely go to waste if unused. Geese eggs are primarily considered a spring delicacy, there is only a fairly short window to enjoy the large eggs. In North America, geese primarily lay eggs from as early as mid-February to late May.(USDA, 1) In addition to the limited window for egg production, mother geese are notoriously aggressive for protecting their eggs, both fertilized and unfertilized. (Shoot) This is another big turnoff to potential egg producers, also known as farmers.

There are many wonderful applications for geese eggs including baking, poaching, cooking in a precise water bath, frying, pretty much any way you would use a chicken egg. There were countless options for recipe development, but I thought it would be fun to go in a mostly Spanish route. The inclusion of the the Spanish chorizo really helps elevate the dish and set it apart from your regular old bell pepper baked goose egg.

Spanish chorizo should not be replaced in this recipe with Mexican chorizo. Spanish chorizo is a hog casing stuffed, cured, fermented, and dried style of sausage, similar to pepperoni in technique. Mexican chorizo has different spices and is either free-formed ground pork or stuffed into a casing, but must be cooked. I will demonstrate different styles of sausages and techniques in future Joy and Feast posts, but for now I will only suggest to try finding the best Spanish chorizo available in your area. Pretty much any American charcuterie practitioner worth buying from will offers a Spanish style chorizo.
Baked Goose Egg and Red Pepper with Chorizo

Stuffed Bell Pepper with Baked Goose Egg, Spanish Chorizo, and Chilies

Ingredients
  • 1 Goose egg
  • 1 Large red bell pepper
  • Slices Premium Spanish chorizo
  • 1 Jalapeno, thinly sliced
  • Parsley, minced fine
  • Romano cheese (Parmesan), grated
  • Tabasco sauce
  • salt and pepper to taste
Cooking Directions
  1. Preheat oven to 350F
  2. Cut open the bell pepper and remove the seed pod, any remaining seeds, and the leftover white membrane.
  3. Rub the outside skin of the bell pepper with olive oil or organic canola oil.
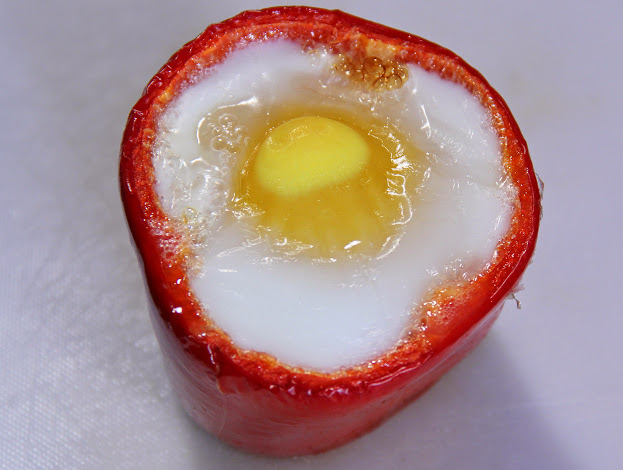
  4. Gently crack the goose egg and fill the bell pepper cavity.
  5. Place the egg-filled pepper in a cast iron pan or an oven proof dish, then bake between 35-50 minutes. The duration of cooking will depend on several factors including egg size and elevation, check at 35 minutes and remove when it is done. Remove the pan when the egg white and yolk are completely set.
  6. Slice the egg filled pepper in half with a very sharp knife.
  7. Plate the pepper and dress with chorizo, jalapeno, parsley, Tabasco, salt, pepper, and Romano cheese on top. The quantities should suite your needs, an omission of chorizo makes this dish vegetarian.
Total Time: 1 hour
Citations and Further Readings:
  • "Canada Goose." Wildlife Services. USDA, Aug. 2009. Web. <http://www.aphis.usda.gov/wildlife_damage/downloads/canada_goose.pdf>.
  • McGee, Harold. On food and cooking: the science and lore of the kitchen. Simon and Schuster, 2007.
  • Shoot, Brittany. "Farmers Take a Gander at Goose Eggs." Modern Farmer. N.p., 17 Apr. 2014. Web. <http://modernfarmer.com/2014/04/farmers-take-gander-goose-eggs/>.
Bourbon Whiskey Pickled Quail Eggs

Dinner parties are a fairly common occasion at my house, in fact we generally entertain guests once or twice a month. A three to five course meal is not uncommon. This amount of work, generally needs a certain amount of harmony when preparing, a low commitment first plate like cheese and charcuterie (the french word generally used for dried/cured/preserved meat) are a favorite first course of mine. Charcuterie can be made well ahead of time, and cheese generally keeps well in the refrigerator, so it's not difficult or time consuming to put a plate together. I always include pickles on my cheese and charcuterie plates because of the acidity of pickles, they create a wonderful contrast between the savoriness of meat and cheese. Due to this I constantly have a pickle of some sort sitting in the back of my fridge or fermenting on the counter.

Pickles in the modern western world are commonly associated with cucumbers. Pickling has a much more significant historical and culturally relevant role than the humble kosher dill tucked in between a pastrami sandwich. Japanese tsukemono, European sauerkraut, and Korean kimchi are all pickles with distinct traditions and important histories. In fact, kimchi was recently added to the UNESCO Intangible Cultural Heritage of Humanity List(Mayring)!

Even though modern pickles are primarily considered as condiments, many cultures have been reliant on pickles as a means of survival. Pickling gave many civilizations a way to make the summer and fall's produce last throughout the winter especially in temperate climates (97, Katz). Pickles have been a means of food preservation or thousands of years, the exact origin of the pickle is uncertain, but evidence of the Mesopotamians pickling cucumber can be traced back to between 2400-2030 B.C.E (Avey).

Pickling is the technique of submerging foodstuff in an acidic environment where harmful bacteria can not survive. Acid occurs in nature, both in flora and fauna, but the most common means of producing a pickle solution was fermentation. Fermentation in the case of pickles is the process of allowing beneficial lactic acid creating bacteria thrive on food which is submerged in a brine. Early civilizations relied on the growth of these helpful bacteria which produce lactic acid as a byproduct of living and multiplying, the growth of lactic acid bacteria made contained environments such as a crock or jar an acidic enough environment which harmful bacteria could not grow. The use of modern day commercial vinegars, which are already fermented, make pickling faster and more convenient than more traditional forms (lacto-bacteria) of pickling.

Pickled eggs may bring up images of a biker dive bar, but I think that they are really fun. I specifically wanted to use quail eggs in this recipe, where in many parts of the world they are considered a delicacy. Truthfully, I used them in this recipe due to their size, they are bite sized, so whether used as a Hors d'oeuvre, Amuse-bouche, or placed on a charcuterie plate, the quail egg gives this pickle a certain degree of sophistication.

There are many different flavoring and preservation ingredients which may enhance a pickle, overtime flavors meld and become an extraordinary experience. I wanted to use Bourbon primarily as a flavoring agent in the solution because it is sweet and savory. Bourbon is my spirit of choice, and is also uniquely designated near the region of the United States where I live. Bourbon is a whiskey made from 70-80% maize, 10-15% malted barley, and either rye or wheat in the remainder of the mash. Bourbon's sweet vanilla notes come from aging in charred oak barrels. This is a particularly impactful process on bourbon's flavor profile because no artificial colors, sweeteners, or flavors may be added to Bourbon, the only additive allowed is water (McGee 768).

In addition to serving this as an element on a meat and cheese plate, I also deviled the eggs and composed a simple salad of dried figs and fresh mozzerella. I wanted to demonstrate the versatility of pickling quail eggs, and hopefully encourage you to add a package of quail eggs on your next grocery list. These delicate and savory eggs are certain to impress at the next potluck or dinner party.

Storage note: These eggs are best eaten within about 2 weeks, and always keep them stored in the refrigerator.
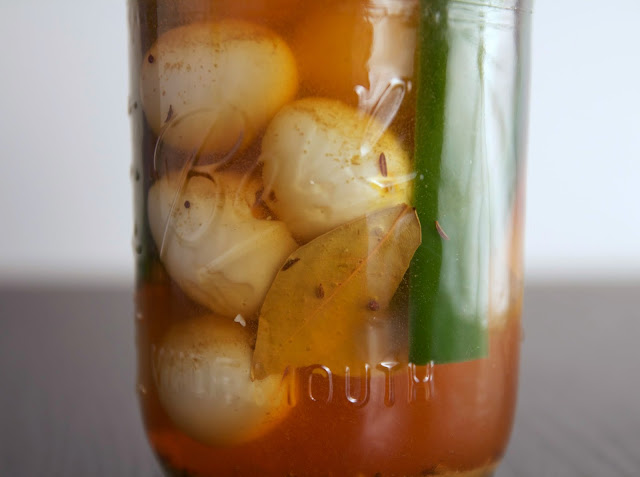
Bourbon Whiskey Pickled Quail Eggss Bourbon Whiskey Pickled Quail Eggs


Bourbon Pickled Quail Eggs


Ingredients
  • 12-18 Quail eggs
  • 1 & 1/4 c Distilled white vinegar
  • 1/2 c Bourbon
  • 1/4 c Maple Syrup
  • 1/4 c Water
  • 1 t Kosher salt
  • 2 Dry bay leaves
  • 1 t Mustard seed
  • 1 Jalapeno, quartered
  • 1 t Coriander seed
  • 1/4 t Caraway seed
Cooking Directions
  1. Combine the white vinegar, Bourbon, maple syrup, water, and salt in a small pot. Bring to a boil then turn off the heat.
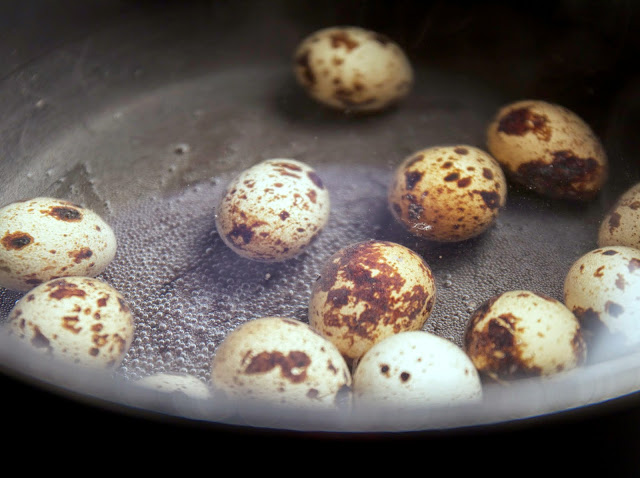
  2. In a separate pot boil all quail eggs for 3 minutes then immediate transfer to an ice bath, let it sit for 15 minutes.
  3. Peel the shells under warm running tap water.
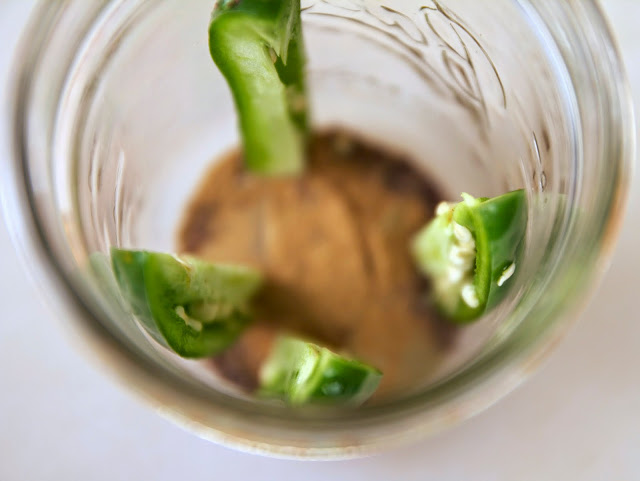
  4. Add the eggs and all the spices into a mason jar, then pour in the liquid pickling brine.
  5. Let the jar come to room temperature, then cap and store in the fridge. Wait three days until serving.
Total Time: 30 min

Citations and Further Readings:
  • Avey, Tori. "History in a Jar: The Story of Pickles." The History Kitchen. PBS, 3 Sept. 2014. Web. 1 Feb. 2015. <http://www.pbs.org/food/the-history-kitchen/history-pickles/>. 
  • Katz, Sandor E. The Art of Fermentation. White River Junciton: Chelsea Green Publishing, 2012. 97. Print. 
  • Mayring, Skye. " Kimchi Tradition Gets UNESCO Designation" January 05, 2014 Travel Age West. N.p., 5 Jan. 2014. Web. 1 Feb. 2015. <http://www.travelagewest.com/News/Kimchi-Tradition-Gets-UNESCO-Designation/#.VM5nLsbZmq4>. 
  • McGee, Harold. On Food and Cooking. New York: Scribner, 1984. 768. Print. 
Photo's by Jordan Henline
Duck Fat Cherry Vanilla Creme Brulee

To a normal human being, dessert is not usually the first thing that comes to mind when one says 'duck fat'. But why not? It is rich and savory, substituting duck fat for butter or cream just makes sense. Granted I would put duck fat in everything if I had an endless supply!

Crème brûlée may seem like a dessert only available in the fanciest of restaurants, but it's actually a pretty simple dessert. Crème brûlée is one of several variations of crème anglaise, which is an indispensable pastry custard known as simple vanilla sauce. Crème anglaise is milk, cream or a combination which is sweetened with sugar, flavored with vanilla, and thickened by egg yolk (Ruhlman 211). Crème brûlée can be made with almost all common pantry ingredients, and it has been for centuries.

The first recipe for crème brûlée appeared in a cookbook by François Massialot called Le Cuisinier Royal et Bourgeois in 1691 C.E. (Muusers). Massialot produced a similar product to a modern crème brûlée but without the modern equipment available to the everyday cook. Massialot used a red hot shovel as a salamander, fresh out of a fire to caramelize the sugar on top of his crème brûlée. We are lucky enough to be well equipped with ovens, broilers, and over 300 years of human trial and error. That means there is no excuse not to create delicious crème brûlée in our homes whenever we please.

My version of crème brûlée contains a personally important triad of flavors. To me duck fat, dark cherry, and vanilla bean represent the feeling of warmth during the winter months. In fact, vanilla in particular has a strong psychological effect with regards to both flavor in scent. Vanilla's scent has been proven to reduce stress and anxiety in humans, "Cancer patients undergoing Magnetic Resonance Imaging - a diagnostic procedure known to be stressful - reported a massive 63% less anxiety when heliotropin (a vanilla fragrance) was administered during the procedure" (Fox 9).

I am uncertain if the pairing of cherry and vanilla is inherently coveted by humans or youthful nostalgia makes it so enticing. Bright red cherries stacked on top of scoops of vanilla ice cream bring back simple yet happy memories for many adults. Cherry and vanilla can be so much more though! The cherry balances out the duck fat and vanilla in this dessert to create a sense of harmony. I find it this convection contradictory, both experimental yet traditional. However, I'd take a contradictory yet delicious dessert over a consonant and dull last course any day.

Caramelize the Crust


Duck Fat Cherry Crème Brûlée

Ingredients
  • 1 & 3/4 c 2% milk
  • 1/2 c Liquid duck fat
  • 1/2 c Frozen sweet cherries (preferably pitted)
  • 1/2 c Sugar
  • 1/2 c Egg yolks (6-7 yolks)
  • 1 Vanilla bean
  • 1 lime
  • pinch of salt
Cooking Directions
  1. Preheat oven to 325 F.
  2. Blend ½ C of pitted cherries in a food processor.
  3. Put the 1 & 3/4th C of 2% milk and pureed cherries in a small pot, set on medium heat. Scald the milk by heating until the mixture reaches 180 F. Once the milk reaches this point take off heat immediately, set aside covered for 15 minutes.
  4. Now pour ½ C of egg yolks, ½ C of sugar, the scraped insides of the vanilla pod, and a pinch of salt into a separate metal bowl. Place the leftover vanilla pod in the resting pot containing the milk. Whisk the egg/sugar mixture until thoroughly combined.
  5. After the milk mixture has sat for 15 minutes, slowly pour through a strainer into the egg yolks. The milk may still be warm, thus temper the egg mixture by pouring a little milk then whisking. Repeat this process several times before incorporating the milk mixture into the eggs.
  6. Take the room temperature ½ C of liquid duck fat and pour as slowly as possible into the egg/milk mixture. Try to keep the stream as thin as a pen head or smaller while pouring. Vigorously mix to incorporate the duck fat into the liquid.
  7. Set up a double boiler by bringing a pot of water to a boil that is small enough to place your metal bowl on top of. Let the Metal bowl sit for 3-5 minutes while slowly stirring. The mixture should thicken up enough to coat the back of a wooden spoon.
  8. Once the mixture achieves a thickened consistency carefully pour into 6 separate 4 ounce and oven safe ramekins.
  9. Carefully place ramekins into a deep hotel pan and make sure there is plenty of space between ramekins. If you don’t have a hotel pan any deep oven-safe dish is fine.
  10. Pour water into the hotel pan, thus the water comes about ½ - 2/3 of the way up the sides of the ramekins. Be careful not to submerge any of the custard in water.
  11. Slowly place the water bath into the preheated oven for roughly 40-45 minutes or until the custard is set. The custard is set when there is a slight jiggle in the center, but it is no longer liquid. The best way to get perfect set custard is to check at around 35 minutes and then check often afterwards.
  12. Carefully remove the crème brûlée from the oven, and then remove from the water bath. Transfer all ramekins to the refrigerator for 90 minutes.
  13. When ready to serve sprinkle enough brown sugar to lightly coat the top of the custard. For best results use a crème brûlée torch to caramelize the sugar until the heat forms a perfect shell. If that is not available place the ramekins under a high heated broiler and watch as the sugar caramelizes.
  14. To finish the dish lightly sprinkle lime zest over the top of the caramelized shell.
Total Time: 3 Hours

Citations and Further Readings:
  • Fox, Kate. "The Smell Report." Social Issues Research Center. SIRC, n.d. Web. 18 Nov. 2014.
  • Muusers, Christianne. "Crème Brûlée." Coquinaria. N.p., 20 Feb. 2005. Web. 18 Nov. 2014.
  • Ruhlman, Michael. Ratio. New York: Scribner, 2009. 211. Print.
Photos by Jordan Henline
Onesen Tamago, ontop of nori. Topped with smoked salt, cracked pepper, and sesame seeds Onsen Tamago is a traditional Japanese way of cooking a slow poached egg. Traditionally, Japanese people would bring eggs to local hot springs heated by the volcanic activity on the island. They would put their eggs in the hot spring water and take them out 40 minutes later to have perfect Onsen Tamago or Hot Spring Eggs. (Salat) Debate of the perfect temperature ranges from 145 F and 160 F and the 15 degrees make a huge difference. 148-150 F is perfect for an extremely soft egg white and custard-like yolk.

This recipe is so important because it is one of the most simple ways to demonstrate water bath cooking. water bath cooking is an ever growing important technique in cooking all sorts of food. What makes cooking in a water bath different from poaching or boiling food is the precise control in temperature and time. There are also specific pieces of equipment used to achieve holding the desired temperature. There are others on the internet who have explained water bath equipment better than myself so please check this link for Modernist Cuisine Made Easy’s in depth explanation of water bath equipment

Water bath’s are the dumb cousin to the technique I will be referring too later on known as Sous Vide. Sous Vide cooking involves a precise water bath with the addition of food being cooked in a vacuum sealed bag for maximum flavor and minimal oxidation to the food.

Onsen Tamago


Ingredients
  • Chicken eggs
Cooking Directions
  1. Heat your waterbath via any sous vide technology to 148F and carefully lower eggs in with a slotted spoon.
  2. Remove eggs after 40 minutes, serve.
Total Time: 45 min

Citations and Further Readings:
  • Salat, Harris. "Onsen Tamago, or poaching eggs in their shell." Japanese Food Report. N.p., 28 Dec. 2012. Web. 15 June 2014.
 Photos by Jordan Henline